Sunday, December 13, 2015

DIY: White Wooden Christmas Reindeer

It all started with some little cardboard models...

I traced the pieces onto a piece of grid paper and then enlarged the images by scaling up to 6inch grid as you can see below. It is really only five pieces: two body types, a tail, an antler, and some legs.


The next step was to cut out the large templates and trace them onto outdoor grade plywood (it has been specially treated to resist the elements). Then it's time to cut out the pieces with a  jigsaw


The next step is to prime. We used this primer but you can use another as long as it is intended for outdoor use.


 Here are the primed pieces. Now it's time to paint. We used a outdoor grade Rust Scat paint in white. It took 2-3 coats to get the coverage we wanted. The other thing we had to do (but I didn't take a picture of) is that we had to cut notches into the bodies and legs so that the antlers, tails, etc could all fit together.

Here is the finished project:


We ended up placing two reindeer by the front door and then two out closer to the end of the driveway (it's a loooong driveway). I'm so happy with how these turned out!

Thanks for stopping by! Please be sure to sign up for email updates (upper right side of the page)!
Happy Holidays to you and your family!

Saturday, November 28, 2015

Designer White Flocked Tree

I was out holiday shopping the other day and stopped into Arhaus for some design inspiration. They always stage their showrooms beautifully - you can be inspired just walking around for a few minutes. Needless to say, I was more than just a little inspired... I walked out with a 6ft flocked white Christmas tree (http://www.arhaus.com/furniture/decor/holiday-accents/avalanche-72-inch-lit-tree/). Oops... At least it was on Sale (75% off!). Who can afford a $599 tree? Not a medical student, that's for sure, but I justified the lightened price tag as being the same cost as three real trees... 

While I was there, I checked out the ornaments, also on super-sale for $1 (orig. $5)! I picked up 10 satin finish turquoise, 10 shiny turquoise and 2 white satin. My mom picked up some beautiful glass turquoise ornaments which she loaned me this year. 

Next, I stopped by The Proper Garden, an upscale garden store to get inspired on how to decorate my new tree. They do their trees over the top there like beautiful works of art. They are the epitome of "designer" trees! 

I also picked up some ribbon at Hobby Lobby in silver. I got to work when I got home, raiding the craft room for everything glitter and shine in blues, slivers and greens. 

I started with the ribbon and then added the extras including glittering floral "pickings", ornaments, pears, pearl berries, etc. 

I am really happy with how it turned out but I admit that I was definitely intimidated at first because it seemed like such an undertaking! Hopefully this can serve as inspiration to all of my friends that like this type of tree but have been to nervous to attempt it! 

I have included several pictures at different time of the day because it is so wild how the lighting changes how the tree looks and also because different lighting picks out different elements of the design. I set up the tree in our kitchen/informal dining area because our regular family tree was in the living room. 


One last Giant Picture to show details:


As always, thanks for stopping by! Please subscribe by entering your email in the box on the upper right!

Monday, October 5, 2015

Refinished Walnut Bedside Table

This project was a very gratifying one! Over the years this table has acquired some dings, water rings and general wear. Since I have been working on refinishing my new (to me) mahogany bed (post on that soon to come) I thought I might as well fix up the table as well. I used the same materials as on the bed and I'm excited with how it has turned out!


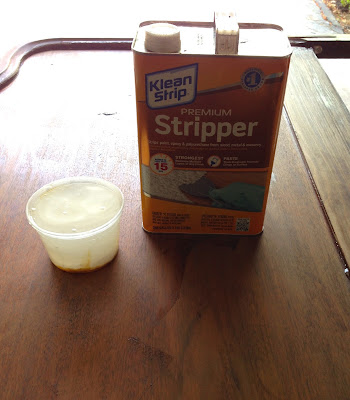
After using 3-4 coats of Stripper and the After Wash I was able to reveal the beautiful walnut wood underneath. This project was complicated by the detail of the legs. I found that the best way to use the stripper was to apply, let sit for 15min and then remove by rubbing with steel wood (legs only, try to of with the grain as much as possible) and on the flat surfaces scraping off with a putty knife. Prior to staining, I lightly sanded to get rid of any rough spots and superficial imperfections.


This stain is really nice and looks like a rich (but not super red) mahogany. I'm so excited to finish my bed and see these two pieces together!


After staining, I brushed on a coat of Minwax Polycrylic. I let it dry for a day before doing a light sand with #220 and wiping off the dust. I then put on a second and final coat. Thats it!


Thanks for reading! Please subscribe up on the right to get updates on new posts! 


Monday, September 21, 2015

Hello Gorgeous: Freezer Paper Transfer Pillow

Things have been crazy recently with residency applications, audition rotations and more. I've been working on a few larger time-consuming projects but here's a quick one. I have been seeing a ton of pins on Pinterest about transferring text and images to wood and fabric.  

I ended up using the font Edwardian Script ITC. 
The first step is print your image on regular copy paper to ensure that your image doesn't extend beyond your printer's printable area (thereby cutting off part of your image). Next cut a piece of freezer paper to the size of your printer paper. Using a spray adhesive (I like Scotch 77) attach the two together so that the waxy side is facing out. 


I read about several different ways to transfer images and decided to try them all out before committing on the actual pillow fabric. 

Here is the standard transfer, just placing the wax side firmly on the fabric and applying pressure to help transfer. Speed is key! As soon as the fused paper comes through the printer, get it on the fabric! This method is fine but the image is a bit muted.


Next I tried the method where you slightly dampen the fabric with water before transferring. As you can see, though the image is darker, it also bled considerably. 


The last method, and my favorite, involved spraying the fabric with a light coat of hairspray prior to transferring. As you can see it results in a slightly darker image without any bleeding. 


Here are all three together for comparison.


After practicing a few times I was ready for the real deal. I had purchased an upholstery weight fabric and laid it out. I made sure to center my image height and width wise on the fabric and used my fingernails to rub the image (this really helped). I sewed the pillow cover together with a flap in the back to get the pillow in rather than messing with a zipper. 


Please note that the transfer is not permanent! This is good and bad. On the one hand you have to go over it with Sharpie or paint to make it permanent but it also gives you the flexibility to wash and reuse, transferring a different image. 

Here's the finished product!


Thanks for reading and be sure to subscribe for email notifications of new posts up on the right!


Sunday, May 24, 2015

DIY Spice Jar Labels


This is a project for the little slice of OCD in all of us. My mother had a big collection of spices, mostly from the Spice Island company but not all of the bottles matched and some were from other companies altogether. And so we set out to make all of her spices match...

We began by putting all of the spices that were not in Spice Island bottles into empty Spice Island bottles. Next we heated up some water and placed all of the bottles in (not submerged) and waited for the labels to peel off - about 5 minutes or so. We used Goo Gone to get any excess label residue off.

I made labels on my computer and printed them out on sticky backed photo-quality paper. 


I sprayed all of the labels with a Fixatif  to prevent smearing of the ink.

I used a scrapbooking oval cutter to cut them out but you could easily just use scissors.
I used an adhesive backed paper so I just had to peel off and stick!
You could also use the same spray mount as I used for my DIY French Quote Canvas to adhere the labels to the jars. 

Next we spray painted all of the jar lids with this Rust-oleum metallic spray paint.

Here are the finished products:


Thanks for visiting! Be sure to email subscribe to get updates on new posts!